Independent Stampin Up! Demonstrator since 2007
Welcome to my little ole' stamping blog! I'm so glad that you stopped by! I have lots of creative things to share with you with the occasional life post thrown in! Come on in, relax and stay awhile! :)

Saturday, August 27, 2011

Puppy Love!

Hello! How are you today?!  I am going a little nutty sitting around waiting for the Miss Hurricane Irene to come and go so I decided I needed a project to work on!  I had kind of a silly idea and threw together a few scrapbook pages!  I have decided to make a little scrapbook of our puppies!  I know, I know!  It really is silly!  We are animal people though and have lots of pictures of our fur kids so I figured...why not?!  Here are just a couple of the pages I have so far:

This is going to be the first page when you open the album cover!  I LOVE punch art and making this little guy  was so much fun! Doesn't he just look like trouble?! LOL

Ears, Cheeks and Tongue: Build-A-Blossom Punch
Head: 1 3/4" Circle Punch
Eyes: 1/2" Circle and circle from Itty Bitty Punch Pack
Nose: Ornament Punch
Lower Lip and Paws: 1" Circle Punch
Toe Dividers: Centers from Petals of Triple Layer Build A Blossom Punch
Letters: BillBoard
Paws: Small Oval and Circle from Itty Bitty Punch Pack

Close up!

Page #1

Paws Pads popped up on dimensionals. Faux stitching done with a white gel pen.

Page #2

More Punch art! 


 I will show you more once I get some pictures added and a few more pages done! I hope that you are having a good day! I will be back soonest with something else to share!

Friday, August 26, 2011

Hurricane, hurricane...go away!!

Hello!  Sorry to have missed a post yesterday, but we spent most of the day preparing to evacuate to avoid Miss Hurricane Irene's wrath!  We had decided to just move inland some and stay in a hotel, but she seems to be dead set on visiting us up close and personal!  So, we have changed our plans and are heading to our other home much further away from the coast for a few days!

We are about to hit the road, but I wanted to share a quick post with you today!  My hubby has a cousin who is about to welcome a new little one into the world and I needed a card for the shower this weekend.   Here is the card I made for them:

I went with all pinks because they are expecting a little lady and also it is my very favorite color of all time! :)

I colored the stamp with lots of different colored markers and used lots of layers!  I added three small pearls and used a small leftover piece of DSP from a retired package. (Which I love and miss very much!) 

Stamps: Every Little Bit
Paper: Blushing Bride and Very Vanilla
Ink: Choc Chip, Island Indigo, Lucky Limeade. Calypso Coral, More Mustard and Pretty in Pink
Extras: Pearls

Also, thought I would share a funny sign from a motel in the area:

My thought exactly!  

Ok, I have to run!  I am not sure how long we will be away and because I have left most of my stamp stuff behind  (SNIFFLES!! Please keep your fingers and toes crossed that it will all avoid any damage from the storm) I am not sure how often I will be able to post over the next few days.  I do have some stuff where I will be though and will try to be creative!  Have a good day and if you are in Irene's way please be safe!

Be back soonest! :)

Wednesday, August 24, 2011

Cute lil' box tutorial!

Good morning! :)  How are you today?!  Wonderful I hope!  I have the  tutorial that I promised to share with you!  I want to say again that this is NOT my original idea!!  If you are the brains behind this adorable box please give me a shout out because I would LOVE to give you credit for this little guy (and say thank you for sharing!)!

Ok, here we go!  Grab an 8.5 X 11 piece of card stock (and some chocolate to fill your new box with). {{You could try this with DSP, but if you plan to fill it with chocolate (the perfect gift!!) I would recommend using cardstock!}}

Turn it on it's long side and score it at 1", 2", 4 1/2", 6 1/2", 9" and 10".  Phew!  That was a lot of work!  Grab and eat one of the chocolates...yum!


Now flip your paper over to it's short side and score at 2 1/2" and 6" like this:

Now cut out the four corners like this:

Now round the corners of the two stick-y out (technical term!) tabs like this:

Score the four new corners diagonally like this:
Since that was harder than it looked eat another piece of chocolate (or even two!)! Ok, NOW would be the time to do any stamping while the project is still flat!


 Your box should look like this after all of that folding:
...and like this:


 Once all of your stamping and  folding is done fold in the corners (that were scored diagonally) and lay them flat against the sides.  You will need to secure them to the sides with either a brad or with sticky strip.  I always use sticky strip for my 3D projects because snail just won't hold up to the job!


This is how it should look secured (minus my finger!).  You guessed it...now have another chocolate. :)

Now hold the two top flaps together and using a hole punch or Crop-o-dile,  punch two holes into them side by side about an inch apart.  You are going to thread a ribbon through to tie into a bow or knot  to secure the flaps together and to be decorative! :) 


Ok, almost done!

Mine does not have the holes you, but you can figure that out!
There you go...an easy box from one sheet of 8.5 x 11!

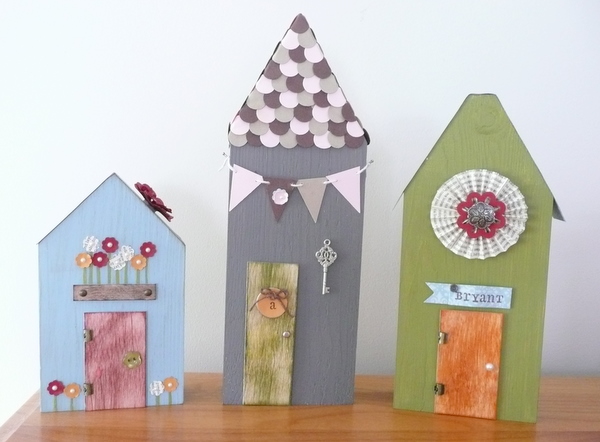
Here is a flashback to the two I made using this design:


Hope this was clearer than mud and that you are able to make sense of it! LOL  If you have any questions, please feel free to e mail me! :)

I will be back soonest with more to share! Have a wonderful day!

Tuesday, August 23, 2011

Another Box!

Hello!  What an exciting couple of days we have had!  Within the last 5 days we have had 2 tornados here!  One tore up a board walk at the beach about 5 roads over from us and the other one whipped through yesterday behind where my daughter was working with a giant thunderstorm on it's heels!  Then today while I was sitting outside on the porch with my daughter we felt the tremors from the earthquake!  Now we are keeping a VERY close eye on Miss Hurricane Irene!  That is a little too much excitement for me, thank you very much! LOL  Sheesh!

I have another little box to share with you today!  This is using the same template that I made yesterday's box from.  You can see that post here.  I really like these little boxes!  I think they would make great little party favors or cute little gift holders!


View from the side.

Close up of the flower.
  If you haven't made these flowers you have to try one!!  Simply punch out three scalloped circles and ball them up.  Really crunch them up good!  Then gently peel apart the layers making two from each circle.  Punch a 1/16's hole in the center of each and insert a brad to hold them all together.  Take the top one and crunch it up and around the brad head.  Do this with all six layers and then fluff out the layers until you have this adorable carnation looking flower.  Easy peasy! I used 2 Cherry Cobblers and one Very Vanilla for this one.

I have had a couple of requests to share the how to's of this box so I will do that tomorrow for you guys!  :)  

Providing that the earth does not open up and swallow us, or that we do not get blown away or that we do not get flooded out I will be back first thing in the morning with that tutorial! LOL

Have a wonderful day! :)


Monday, August 22, 2011

Boxes and flowers!

Good Monday morning to you! :)  I hope that your weekend was wonderful and full of happy!  We had a great weekend!  Hubby and I had a date on Saturday!  WooHoo!!  We took a ferry boat ride and went and had lunch out together.  We shopped in some fun little shops and drove around and saw the sights. It was really nice. :)  Here we are on the ferry:

Isn't he a cutie?! :)

Sunday I spent the day out with two of my kiddos.  We went shopping and bummed around together just having fun!  It was awesome!  I am pretty crazy about my kids!

I did spend some time working on a little project that I saw at convention.   I really love making 3d things so when one of my roomies (Hiya Kavi!) got the cutest little 3d box in a swap  I took an interest!!!  I just loved it! So one of my other roomies was sweet enough to gently un-assemble it and make a template for each of us!  It is made from one sheet of 8.5 x 11 paper and goes together in a snap!  Talk about a fun, quick and easy gift!  I see lots of these in my future!  If this was your original design (you are brilliant!!!)  please let me know so I can give you credit for this adorable thing!  

After a little bit of stamping and scoring and assembling here is the box:
How cute is that!  I feel pretty certain that it would hold a 
 good amount of chocolate too! :)

Side view.

Daisy made from the Big shot.  I layered 5 of them and fluffed it all up to make it look more realistic. Next one I make I will stamp the center with either the grid stamp or polka dots to make it more interesting. 

Side view.

Stamps: Itty Bitty Bits
Ink: Basic Black
Paper: Marina Mist, Bashful Blue, Very Vanilla and Basic Black
Extras: Daisy Big Shot Die, 3/4" Circle Punch, Scallop Border Punch and Marina Mist ribbon

Ok, I am off!  I have a super full day today and if I don't get started I will never get everything done!  Have a wonderful day!  I will be back soonest with more to share!


Saturday, August 20, 2011

Shadow box card

Hello!  Are you enjoying your weekend so far?  Hope so!  I have a little project that I made yesterday that I wanted to share with you!  I have started sending my grandma (she is 94!) a card every day and I am trying to keep them fresh and different.  I found this idea and knew it would be perfect so I gave it a try!  It was super easy to make and I just love the way it looks all finished!  It is called a shadow box card. Here is is:
I was really tickled with how it came out!  It is pretty cute in person if I do say so myself! :)

Here is a view from the top. It stands up by itself and has lots of dimension to it.  In addition to being 3-D
 I used lots of pop dots! LOL

Here is a close up of the inside.  I 2 step stamped (say that 3 times real fast!) and then water colored the stems. I raised the insides of the flowers with pop dots and I stamped the tiny butterflies and  added Dazzling Diamonds to them to make them sparkle.


I also made a 3X3 card to send along with it.  I stamped the large flower once and the smaller flower 4x and cut out each section and layered them with pop dots.
Here is a side view to show the layers.

Here is the recipe for this project:
Stamps: Raining Flowers, Easy Events, Itty Bitty Bits and Thanks for Caring
Ink: Wisteria Wonder, Pretty in Pink, Chocolate Chip, Wild Wasabi, Island Indigo and Pear Pizzazz
Paper: Wisteria Wonder, Regal Rose, Crumb Cake and Very Vanilla
Extras: Pop Dots, Pearls and Dazzling Diamonds

I plan on making more of these!  They fold flat to mail and make a nice table decoration!  
I will be back soonest with more to share!  Enjoy your Saturday!  Do something fun...stamp a little! :)


Friday, August 19, 2011

Last of the convention goodies!

Hello!!  Happy, happy Friday! :)  I have a few more convention goodies to share with you today and then I promise I will get back to more crafty goodness! :)  Another one of my favorite parts of Convention is the bag you get in the beginning!  It is always fun to wonder about what it is going to look like and what DSP it is going to match (if any!).   I go planning to love it to pieces no matter what it looks like!  Let's be honest here!  I am a girl and well girls LOVE bags! LOL  I loved last years bag and I truly LOVED this years bag!  IT IS GORGEOUS!!!!  Have a peek-see:

Isn't this a beauty?!  And talk about pockets!!  OMGoodness!!  It has a ton of pockets and compartments and hide-y holes!  I LOVE it!!  The embroidered flowers on the front are just beautiful! 


I added the matching ribbon tassel to dress it up even more! So preeeeetty! :)

This year Stampin Up! offered an additional classes so I chose The Village of Cuteness class.  In addition to the really cute project  there were super yummy cupcakes!  Score! :)  I am all about the dessert!  Here are the house that I made:
I wound up finishing mine at home because I wanted to make some changes. 
I changed the color of my roof on this one and the pennant flag colors to match.

I changed the roof on this one and added a  few extra flowers along the bottom.


I changed the roof color on this one and used a pearl for the doorknob instead of the safety pin that came in the kit.

I really liked these houses!  I was kind of on the fence about them until I saw the finished product, but now they are dressing up a window in our new place and I couldn't be more pleased with them! :)

Another fun tradition at Convention is to exchange roommate gifts.  I was super lucky to have very talented roommates!  Look at all of these amazing goodies:
This is a beautiful case made by Kaye!  LOVE it!  It is one of our DVD cases that hold our clear stamps!  But take a look at this...

Ok, how cool is this?!!! These cute little pockets fold out and they are Simply Adorned Charm holders!!!!

This next gift was from Kavi.  She made us all personalized notebook holders with a matching pen and bookmark!  The outside is a file folder!! This came in handy for all my notes!  I absolutely love it!  She spoiled us rotten with lots of little gifts!

The inside!


This was another gift from Kavi.  There was a Starbucks gift card hiding inside! Yum!

This fun bag was from Coleen!  It was full of all sorts of goodies!  Coleen also made all of us an adorable bag tag for our new bags.  

This awesome gift was from Carolyn!  Isn't this adorable??  It is a lawn ornament made using the Big Shot!  She is so clever!  I love it!

Well, there you have it!  Convention was awesome and I am already thinking about next year! :)  

I will be back soonest with something stamped to share with you! Have a wonderful day!